Can you see why it’s been a while since I’ve posted? Crafts are a lot of work! I can cook all the livelong day and still be planning the menu for tomorrow, but throw me a craft project and it requires all my mental faculties to make it turn out good. Granted, this probably stems from my unhealthily high level of self-imposed perfectionism, but there you have it. Crafts are fun, but they are definitely a project.
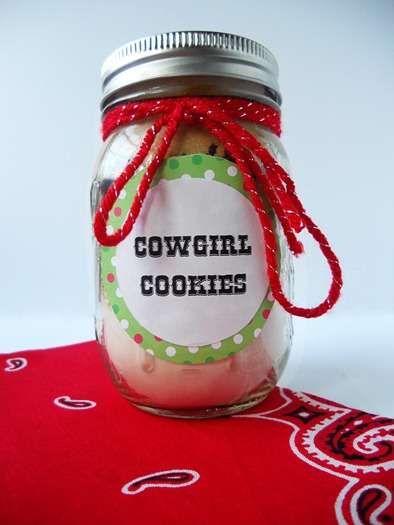
In this case, I made Bakerella’s Cowgirl Cookies for almost every close relative I have.
Spoiler alert to almost every close relative I have. You’re getting some of these cookies for Christmas.
However, this is a blessing in disguise because I misprinted the labels on one of the jars for my cousins. Attention A, V, & T: One of your cookie labels says to use 1 teaspoon vanilla extract. It’s supposed to say 1/2 teaspoon, since it’s a half-batch. Not that half a teaspoon makes all the much of a difference, but still, consider yourselves warned. 😀
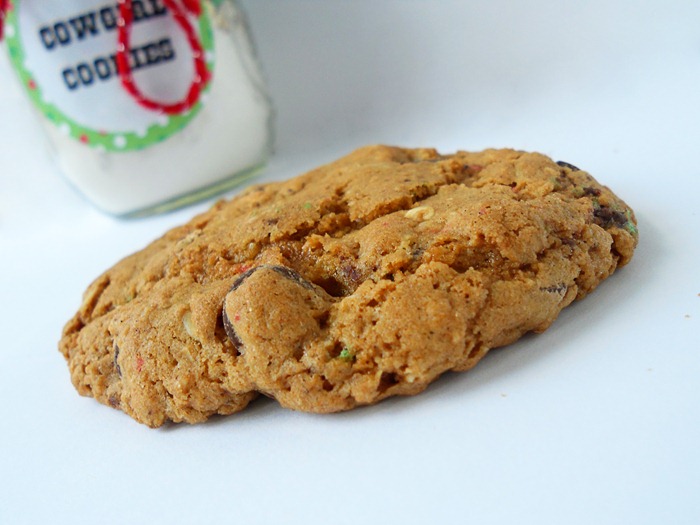
Now that the aforementioned unhealthily high level of self-imposed perfectionism has been further perpetuated, let me give these cookies a proper introduction. In short, they’re awesome. Like oatmeal, chocolate chip, and Christmas-colored m&ms kind of awesome. Plus, by cutely packaging the dry ingredients and decorating them with some shiny yarn and a jazzy label, you’ve got a really great Christmas gift that works for just about anyone.
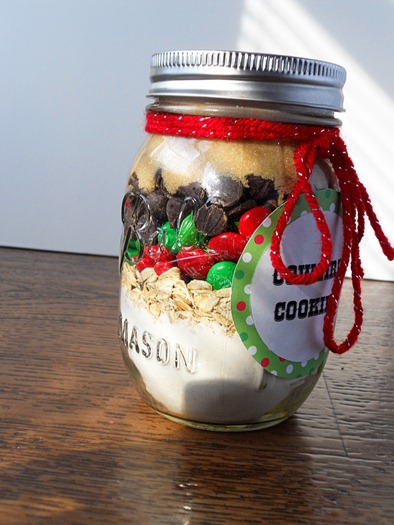
It’s as simple as layering the ingredients in a glass jar that you can find at any craft store.
However, before I show you the step-by-step, I must state two things:
- I am demonstrating a halved recipe. Use a larger (think quart-sized) jar for a full recipe.
- You must pack the ingredients down very well for them all to fit. Thanks to an ingenious suggestion from my dad, I found out that a mortar does a really great job at this task.
Now that the technicalities are out of the way, all you do is mix some flour, baking powder, baking soda, and salt in a bowl and pour it into the jar.
To this, add some oats…
…then some Christmas-y m&ms…
…and semi-sweet chocolate chips…
…brown sugar…
…and granulated sugar.
Pop on the lid and you’re ready for stage two—decorating!
I know, you’re practically leaping out of your seat by now with excitement. Hang in there, kids!
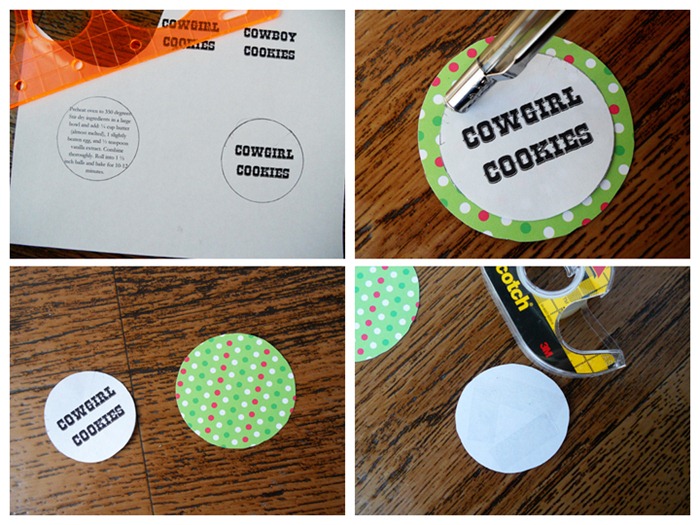
Following some more detailed instructions that I give you later on in the post, prepare your two outer labels, one with the name (which can be freely changed to “Cowboy Cookies” if you’re giving these to a guy) and one with their baking instructions.
And there you go! Tie a strand of sparkly yarn around the neck of the jar and you’re done! Christmas cheer all around. Not too hard, right? Give it a try!
Cowgirl Cookies
from Bakerella
For the cookie mix:
1 1/3 cups all-purpose flour
1 teaspoon baking powder
1 teaspoon baking soda
1/4 teaspoon salt
1 cup cooking oats
3/4 cups m&ms
3/4 cup semi-sweet chocolate chips
1/2 cup brown sugar, packed
1/2 cup granulated sugar
For the packaging:
1 quart-size glass jar with an airtight lid
1 1/2 feet colored yarn
1 sheet festive holiday paper
scissors
double-sided tape (the permanent scrapbooking variety works best)
Assembly
In a small bowl, whisk together the flour, baking powder, baking soda, and salt. Pour into jar, packing it down as much as possible. Add the oats, then the m&ms, then the chocolate chips, then the brown sugar, then the granulated sugar, firmly packing down each layer as you go. Seriously, pack it down, or it won’t all fit. I found that a mortar works best. Once everything’s in the jar, pop the lid on top.
For the tags, it’s easiest to download the PDF Bakerella provides for her version. If you like, you can make your own by opening a Microsoft Word (or similar text editing software) document and typing “Cowgirl/-boy Cookies” on a line in a large, fun font (I got mine for free at dafont.com). Go down a few lines and create a text box. Within that text box, type the recipe baking instructions*, centering the text. Depending on the diameter of the label you want, set the width of the text box to whatever that is (mine was 2 inches). Print those out.
*Note: The back label recipe instructions are as follows…
Preheat oven to 350 degrees.
Stir dry ingredients in a large bowl and add:
1/2 cup butter (almost melted), 1 slightly beaten egg,
and 1 teaspoon vanilla extract.
Combine thoroughly.
Roll into 1 1/2 inch balls and bake for 10-12 minutes.
Using a guide of some sort, trace a circle around the main label and then trace one around the instructions as well. Cut them out and set aside. Using a circle with a diameter slightly wider than that of your main label (I used 2.5 inches), trace a line on the back side of your background paper and then cut it out. Do this for both the front label and the instructions. Make sure to go around the edges with an eraser to pick up any stray pencil marks.
With small pieces of double-sided tape, first adhere the white text label to the front of one of the decorative paper cutouts, taking care that it is centered. Then, again using the double-sided tape, attach the prepared label to the jar, centering it in the middle. Repeat this procedure for the instructions label and attach it to the opposite side of the jar.
Finally, tie a bow of yarn around the neck of the jar. For mine, I wrapped the strand of yarn first around the back of the jar, meeting the ends at the front, then crossing them over and bringing them around the back to the front again before tying the yarn in a double knot, trimming excess strands as needed.
Pack them up in a pretty bag and hide them under the tree!


What a great gift! And I love the name. Who wouldn't want to get cookies ready to bake. You're wicked clever my friend…
What a cute idea! You get to bake without all the bothersome measuring out and flour everywhere. This would make a great gift for my sis.
Very cute! I love the presentation 🙂
Those cookies sound delectible! I love the idea of home-made ready to bake cookies!
Thanks for making preliminary test batches of these cookies before you gave them away. They are delicious and it was amazing how many times we had to sample the results.You are the greatest.
@Jenny: Why thank you! 😀
@Suzler: I've made a few test batches (read: I totally messed up the filling on one of the jars) and it's so fun to dump the whole thing in a bowl and mix it all up. 😀
@BigAppleNosh: Thank you!!
@Becky: Thanks! 🙂
@My Mom: I'm glad to have such lovely taste-testers! 😀
Merry Christmas Koci! Seems like you are having a good one already!
These sound great!
This is such a cute idea… The m&ms give it such a fun punch of color 🙂
love love love this!!!!! so fun and festive!!! merry christmas koci!!!
Koci-Such a special and personal gift to give. Not only pretty, but practical, and delicious, as well!
Hope you had a wonderful Christmas, with family and friends!
Nope, mine is correct. its either V or T's…Thanks for the heads up! I haven't got around to making them yet but I am glad that you mentioned there was a mistake on one of them. I'll let you know what I think.=)